Like many others I know, I am a people pleaser. I say yes to things before I think about if I really want to do them. I commit myself to too much because I feel guilty for not taking every opportunity that is thrown at me.
That mixed with being a bit of a workaholic has always gotten me in trouble. I tend to go and go and go until I get overwhelmed or burnt out. Only in the past year or so have I realized that committing to less and making those commitments things I really want to do, is better for me and everyone involved in the long run.
With that said, I’d like to reintroduce my business to you as Isabel Madeline – Creative Services. The difference being I will be focusing my efforts on helping entrepreneurs and small businesses specifically with the creative side of their business.
What does this include?
Commissioned Illustration Prints
Illustration Designs for Companies Branding
Graphic Design Services
Website Design and Management
Social Media Management
Video Editing
Video/Infographic Creation
Content/Caption and other small writings
SEO Research (upon request)
What are we cutting out?
Administrative duties
Organizing emails/inboxes
Scheduling
Research for Projects or Programs
File Management
Database Management
Reports
I am doing this because well first, I want to really enjoy what I’m offering to others so that I do an amazing job at it. And also, I’m really good at what I do creatively.
Now that we’ve gotten that out of the way…
Here are a couple of snippets of current/upcoming projects I will be sharing soon!
I gave in to TikTok…
I have a TikTok! It’s mostly me doing suggested/requested drawings or something I think of. Check it out and feel free to follow me.
Art Therapy Thursdays
I want to create a community for people to use art as their therapy. I have used art to get me through so many things and I’d love to share some ways it has helped me.
My Anxiety Workbook
This one has been in the works since… well it’s been several years. But I have finally set a firm deadline of completion and will be sharing snippets of the content soon!
I’ve never been a person who stuck with resolutions… but then again… how many people really are? The idea of starting new, getting motivated and being ‘perfect’ in the dead of winter, right after Christmas, with not much to look forward too is kind of odd, isn’t it?
Not to mention the fact that we are still in the middle of a global pandemic accompanied by a horrible market for pretty much everything from houses to gas to tomatoes at the supermarket.
I’m not trying to be a total downer, but let’s all just admit it. It’s hard right now. I mean, it’s hard anytime to rework yourself, but in the middle of winter? Who decided that?
Anyways, after much consideration on whether I even wanted to plan anything productive for myself to work on at all or if I just wanted to crawl into bed and do the bare minimum… I have come up with a new plan. Not resolutions, intentions.
“If You Fail to Plan, You Are Planning to Fail”
Benjamine Franklin
So, I’m obsessed with my Bullet Journal. If you’ve never heard of the Bullet Journal method and Ryder Carroll’s book, I would highly recommend at least looking into it. Recently, he had a seminar about setting up your Bullet Journal for 2022, which I watched back after it was recorded.
One of the biggest takeaways I got from this seminar was a different approach to being productive. No more resolutions doesn’t mean nothing will get done. In fact, hopefully it means more will.
A resolution is a commitment to an outcome, but there’s no way to know an outcome. You’re committing to something that’s out of your control. For instance, what if… say… a crazy infectious virus appears and shuts down all the gyms, makes it horrible to find a decent apartment at a good price and lowers the overall frame of mind of everyone everywhere.
Okay then, instead of resolutions… what? I can’t just do nothing.
I know, I know, calm down. There’s still a plan. Goals. Goals are the definition of an outcome. And plans are a definition of a process.
How do goals help when resolutions don’t? Because they go hand-in-hand with intentions. My new favorite things.
Goals are there to help you experience something. Why exercise? To feel more comfortable in your own skin. Why organize? To be more motivated at home. This is where intentions come in.
Intentions help us be something.
I want to feel more comfortable in my own skin.
I want to be motivated at home.
Goals are there to help you identify how to be a certain way. To see if these experiences align with who we want to be.
Last week I set my intentions for 2022. Nothing too crazy and I tried to keep it simple and not add too many. In case you’re super curious or just want to keep tabs on me to see if I follow through, here are mine. The first sentence is my intention, the bullet points under are my goals to get to that intention.
Speaking of keeping tabs, seeing as one of my intentions is ‘I will be consistent’, I think it will be a great idea to share the progress of my intentions through my social media channels. One of my favorite intentions I made was ‘I will be artsy’. In line with this intention, I have signed up for a wonderful visual journal class, which I am starting today. Yay!
Anyways, I hope you all are staying warm and stay tuned for more updates on my progress! Here’s a little sneak peak at the first page of my visual journal.
There’s something so satisfying about planning and organizing for me. That’s part of the reason I love doing Virtual Assistant and freelance Graphic Design work. I get to plan out when I have to do what, juggle a bunch of different tasks and decide what needs to be prioritized. But even for me, that can sometimes get overwhelming.
So if you’re someone who hates planning… or just doesn’t have a good organized system for writing down what you have to do, this blog is for you!
Everyone loves free stuff, right?
I’m going to walk you through my whole process of organizing and planning, from start to finish. AND if you are one of those lovely people who is subscribed to my newsletter, you will receive a FREE downloadable weekly organization layout to use in your calendar or bullet journal. If you aren’t subscribed, make sure to do that now so you can get FREE goodies in the future.
Alright, let’s get started. The first thing I do every month is look at any upcoming deadlines, appointments, events or important dates coming up that month. Because I do my Virtual Assistant work from home and also have a full-time job at an office, I have a calendar book at my job where I write all of these dates down.
I also use this calendar book to write down my MIT (Most Important Tasks) on each day of the week.
At home, I have a desk calendar where I write the same important events and write a couple overall MITs in the notes section.
This is an easy way to see upcoming appointments and events at a glance. I try to only use my calendar book and desk calendar for Virtual Assistant and freelance tasks.
Join the Bullet Journal Craze – It’s worth it!
After I have all of my major events written down, I go into my Bullet Journal, this is a catch-all for everything I have to do, from bills due to doctor appointments to projects to pet visits.
I create a monthly overview and write down bills due and how much. I also write down other deadlines for my virtual assistant job if I think they are big enough to have with me every day.
From there, I start building my ‘Weekly Overview’ for the upcoming week. This is usually my favorite part because I like to get a little creative.
My weekly overview usually includes things I know are due and also deadlines I create for personal projects.
We then get into the day-to-day. This is a place where you can really use it as you want.
Sometimes I just jot down everything in my brain, even if I know I won’t get that task done that day. This makes it a lot easier not to forget anything and to have those tasks somewhere. If I don’t complete that task that day, no problem, just move it to the next day.
An Easy Way to View Projects on The Go
I do write tasks for my Virtual Assistant business, but if I know a task is going to turn into a project (ie; there ends up being multiple subtasks within this task), I switch over to my trusty Asana account and create a board specifically for that project.
Asana is also a great place to collaborate with other clients that use it. Not all my clients use Asana, but the ones that do are able to assign me tasks and track my progress.
Notes Never Fail
One last part that completes my organizational system is my note taking journal. Some people use their Bullet Journal or whatever journal they have for tasks to also take notes in, however because I am constantly looking for new courses and online certifications to learn more about specific topics, I have found that having a journal dedicated solely to note taking on these topics is very useful.
This way, I have every note I’ve ever taken in one book and don’t have to flip through as many pages to get to them. I also sometimes use my note taking journal while organizing my bullet journal, which makes having a separate journal even more important.
To organize this journal, I have an index at the start with enough space to add new subjects as I focus on them more, then I just add a headline to the top of the page whenever I switch to a different topic and that’s it! Easy peasy.
Find What Works for You
I know my way of organizing may seem a little over the top, but it works amazingly for me. I love having a mixture of online and paper tools to get me organize and I find that I’m actually excited to plan for a new month or week!
Hopefully you’ve found some of my methods helpful or they have inspired you to think about what would work best for you! Even if you don’t own a business or do freelance work, having a planner and a journal is a great way to keep yourself motivated on whatever goals you have.
That’s it for now! If you are subscribed to my newsletter, you will receive a more in-depth look at some of the ways I use my Bullet Journal as well as a FREE downloadable template to use as a weekly planner. If you aren’t subscribed… what are you waiting for??
Hello and Happy Friday the 13th! Hope it’s been lucky for you so far.
Today’s blog is going to be a bit different! I decided to start up a project I’ve loved doing for years but haven’t taken the time to do, visual journaling. If you don’t know what visual journaling is… here are a few examples of past visual journals I’ve created.
Basically, it’s a journal without limits. You can draw, paint, collage, tape random stuff down, do whatever you want to document your life in a creative way.
I started doing visual journals my junior year of college. I was lucky enough to spend a over a month abroad in Europe for an art class and one of the assignments was to keep a visual journal. I was hooked right away. I took it everywhere, wrote down everything, even had every single person on the trip sign a little message at the end.
The best part, to me, about visual journals is the release. You feel like you’re putting actual stuff down on paper, not just words, and letting it go. Soon after my Europe trip I started my second journal… and then my third… and fourth. And at some point, because of some medical issues and other problems, I stopped.
But now I’m starting back up! I’ve got a journal, a couple good pens… a whole lot of receipts and random paper and I’m ready to get back to it!
So I thought it would be fun to sometimes do a little check-in on my Visual Journal progress, probably once a month, just to show how it’s going.
Here’s the new journal just waiting to be filled up!
I hope if you see this blog, you’ll think about starting a visual journal as well. It’s a great way to relieve stress for me and anybody can do it.
Well hello there and Happy Friday! As you may have noticed… I haven’t posted anything yet this week! That’s mainly because I found myself struggling to keep up with everything, so I decided to take a little break and organize, prioritize and plan everything I need to do for the next couple of months.
Now I know on Friday the last thing on your mind is to set up your goals and to-dos… but honestly I’ve found this is the best time to do it.
Your mind isn’t focused on what all you have to do that week. You’re in a good mood and excited for the weekend. And once you write everything down and organize it, you can relax during the weekend knowing you have a plan.
So here’s my approach at prioritizing and organizing my endless to-do list.
STEP 1: BRAIN DUMP
First, write everything down: Personal and work tasks should be captured in one place.
If you have long-term goals, break them down into yearly, monthly, and weekly achievements. This is your Master List.
Your Master List helps you understand how to prioritize all your tasks. But it can still get complicated when deciding what needs to get done now versus later. There are a few prioritization techniques I use that might help you separate the urgent from the important tasks.
STEP 2: PRIORITIZE
Employ the urgent-versus-important method: Prioritize urgent and important tasks; set a specific time to work on important non urgent tasks; and delegate or remove all other tasks.
In this case, you can use the Eisenhower Matrix.
In basic terms, urgent tasks are things you feel like you need to react to right away, like emails, phone calls, texts, or news. While important tasks are ones that contribute to your long-term mission, values, and goals.
When looking at how to prioritize tasks best, ask which one of the quadrants they best fit in:
Urgent and Important: Do these tasks as soon as possible
Important, but not urgent: Decide when you’ll do these and schedule it
Urgent, but not important: Delegate these tasks to someone else
Neither urgent nor important: Drop these from your schedule as soon as possible
STEP 3: DAILY TASKS
Create a daily MIT list: Write down three Most Important Tasks that should be done that day. These tasks should always relate to your larger, future goals. Nothing else matters here. This is your primary focus for the day.
Then, determine three medium priorities. Ideally, these should be subtasks related to your main priority. And, schedule no more than five small must-to-do- priorities, such as meetings, general chores etc. While these are important and deserve your time, these are smaller to-dos since they don’t require as much energy.
STEP 4: DEADLINES!
Create clear deadlines: Give yourself full visibility of deadlines, even when something doesn’t necessarily need a deadline, make one. It could be a year from now, as long as there is a date attached (which you can always change) so you don’t just forget about it or put it off forever.
As a side note, I use Asana, a great free website and app to organize everything from laundry to client work that needs done.
A few more small tips that are necessary to remember!
Avoid distractions: Intentionally steer clear of competing tasks, especially as task difficulty increases.
Consider effort: When your task list is becoming too much, prioritize according to effort and breeze through those easier tasks more quickly.
Be flexible and adaptable: Uncertainty and change are given. Know that your priorities will change, and often when you least expect them to. So plan for the unexpected.
Know when to cut: Be realistic. You probably can’t get to everything on your list. After you prioritize your tasks and look at your estimates, cut the remaining tasks from your list, and focus on the priorities that you know you must and can complete for the day.
Then take a deep breath, dive in, and be ready for anything.
You know how some weeks feel like you’ve fit 3 weeks into one? That’s how last week felt for me.
I was going to do a blog about being excited for the Olympics on Friday… and compare the grit of going for what YOU want in your business and career goals and yada yada….. But now I have even more of a reason to compare it to my life.
Not only did I bring on another client for my freelance business, I was offered a promotion at my full-time job for a completely new position in the marketing department. It’s one of those things where I literally had to create a pros & cons list.
See? I wasn’t kidding.
I’m one of those people who gets excited about change… but when that change actually comes knocking, I panic and get anxious and can’t make a decision. So, like any responsible adult… I made a list (after texting both my mom, dad & girlfriend to get their opinion).
But here’s the thing, even before being offered this promotion officially, I knew I was going to take it. You know when something is going to be a better opportunity than what you’re doing now.
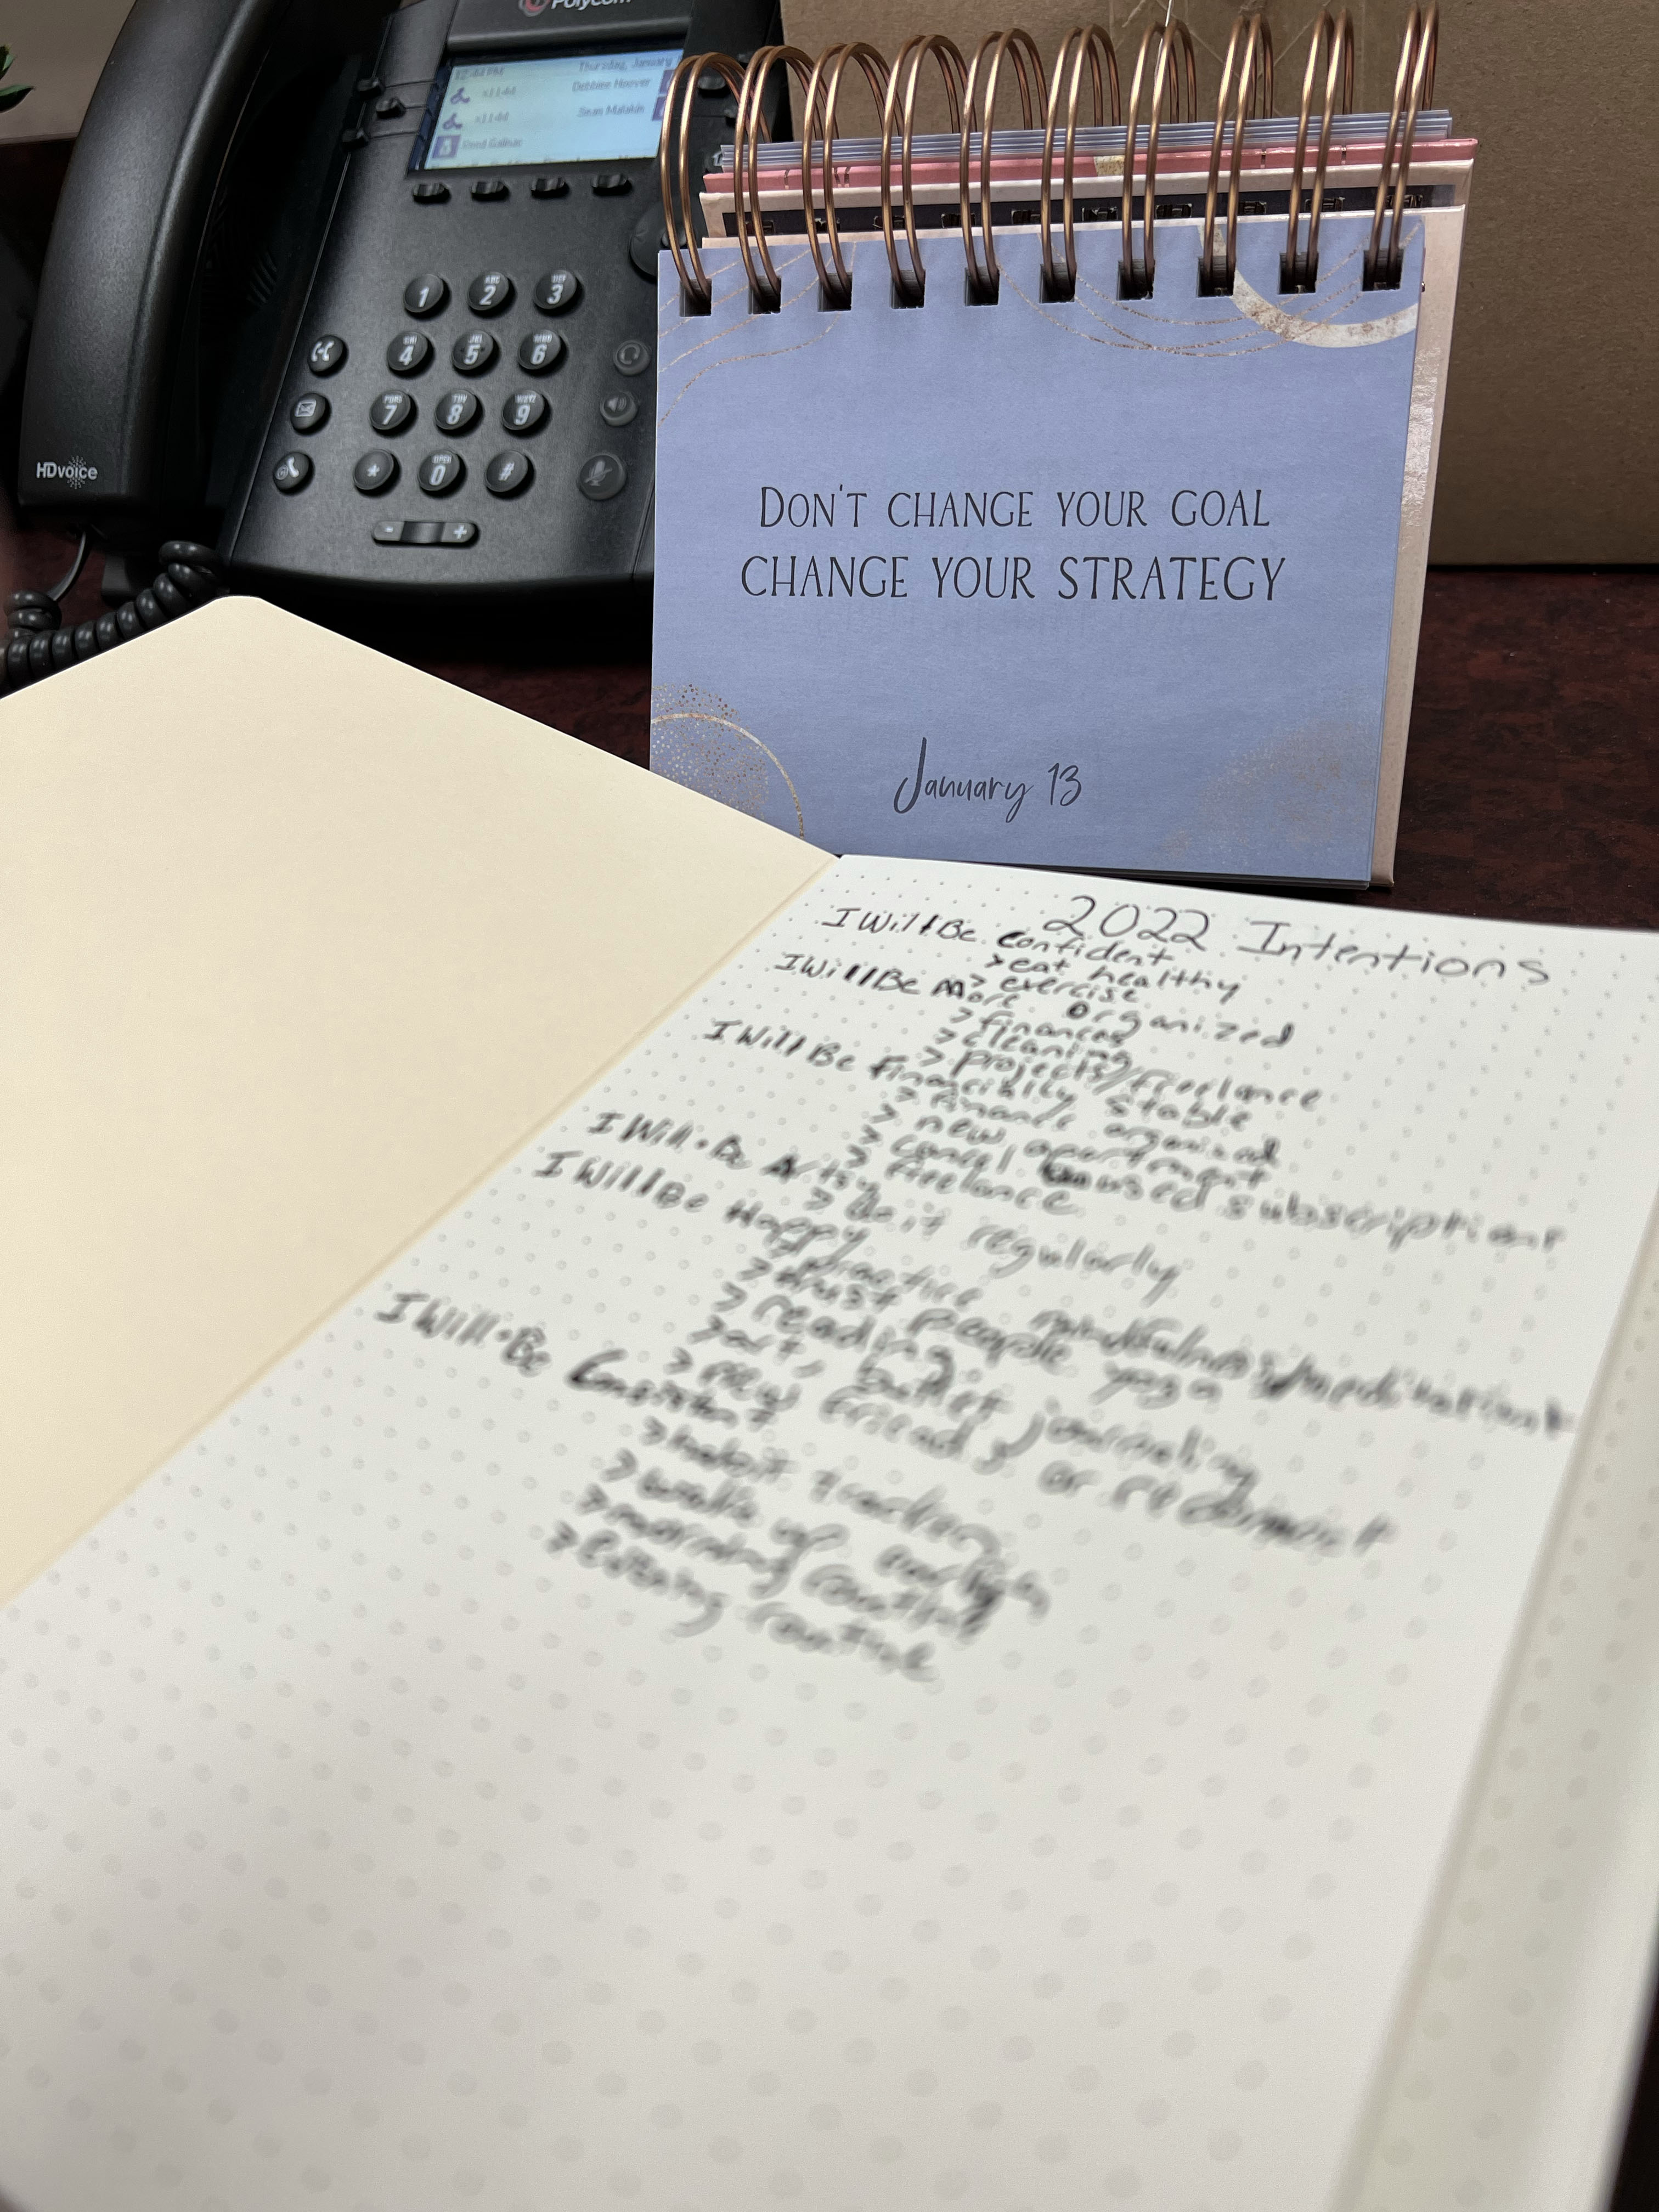
My girlfriend got me this little motivational calendar and this saying came up on the same day I was offered the job. It was just the sign I needed to push me to go through with it!
Being promoted to a Marketing position instead of the Production position I am at now is going to allow me to get daily experience working with campaigns, SEO, blog writing, social media management etc.
So really, if you’re reading this and considering hiring me as your Virtual Assistant, this benefits you too!
Even though I was just expecting to sit here quietly at my desk with the Olympics on in the background doing little to no work and got slightly stressed out as this fork in the road was presented to me… I’m excited for this new pathway and what it will offer me.
Now watching all of these athletes achieving their dream seems a little more special to me as I am actively achieving something as well. I will 100% be sitting on my couch with snacks watching them compete, but with a promotion and new clients in mind.
That’s all I have the mental energy for right now! I’m sure I’ll be updating you on my new opportunities soon enough.
A couple weeks ago I talked about skills to create eye-catching photography, but sometimes it’s easier or will fit your message better to create or use a graphic. As a graphic designer, this happens to be my specialty, so you’re in luck! 😉
Below are my go-to guidelines when creating a graphic.
First and most important, know your audience. If you have the time, do some background on your audience’s interests and think about what type of visual content they’d like to see.
You should also have a cohesive brand. If you have a logo or specific colors you use on your website or other social media sites, stick with those for your posts as well. It might help to create a mood board. A mood board can consist of content, color palettes and other visuals that will help shape your direction.
Another top element to always consider is text used in your graphics. Text in visuals should always be bold, legible, straightforward, and concise. Make sure there’s enough contrast between the text and background so that it’s readable. Images with less than 20% text tend to perform better.
Check out some of these examples I’ve created to show the difference between effective and non-effective design.
White-space is your friend: Use it generously for a cleaner and easier to read look to your graphic. Having too much text and not enough white space can make everything look crowded and overwhelming.
Left: too much text and not enough white space, Right: Minimal text with a large amount of white space
Consistency is key: You want to have at least a couple specific fonts & colors otherwise your content won’t feel cohesive and honestly can look like you just grabbed graphics off the internet.
Left: Too many different font styles, sizes & colors, Right: Two font families that work well together and two colors based on overall brand
Add margins to let your content breathe: without margins, your text and content will look crammed and unplanned.
Left: No margins, text is being cut off, Right: Good margins, text is centered and easy to read.
Pick a font color that has contrasting value to your background: whether your background is another color or an image. A simple rule is to pair a bright saturated color with a neutral that is a contrasting value. Cooler colors and deep colors look best against a white or light background, while brighter pastel colors can stand out well against black or deeper colors.
Left: Colors do not jump out from the background and could be hard to read, Right: Colors pop and are crisp and work well with the dark background color.
Make sure your background isn’t too busy if you’re going to add text: This is pretty self explanatory, but a definite must. Having an image at only 20% opacity or less, or placing a colored box with at least 80% opacity will help make your text legible.
Left: The text is light and the background image is busy, Right: The text is dark, there is a 80% opacity block over the image to create a better contrast
Adjust the leading of your text lines so that they feel a good distance apart, but not too far apart: Leading is the spacing between your lines of text. If you have more than one ‘idea’ in your post, make sure to group them together using more or less space between the lines.
This one is pretty self-explanatory. A good rule of thumb is to have the leading be at least two points higher than your font size.
Don’t mix & match your justification: Either center-justify or left-justify and don’t mix the two. Usually center-justify works best for Instagram because of the square shape of the post, but sometimes left-justify can be used when you have bullet points or when you have an image or shape on the left to create an outline of your text.
Left: While it may be tempting to ‘mix it up’ using more than one justification can make your text look sloppy, Right: Center-justify works great for Instagram because all the posts are squares.
Length matters: Make sure that the length of your lines in larger blocks of text are not inconsistent in length. Also be mindful of ‘widows’ and ‘orphans’ as they can create an awkward dynamic and spacing in your graphic.
Left: Widows & orphans make lines look awkward and unplanned. Right:
Going for a soft or medium gray instead of black might just be your best bet: Black text is very dramatic (especially when paired against white) and can feel a bit harsh if used too often. Unless your intention is to be a bit harsh, gray is a great alternative and still comes across strong.
Left: While black font is great for captions and writing in general, when it comes to graphics, it can be a bit much, Right: using a medium to light gray can make your graphics look sleeker and more appealing to the eye.guidelines
One of my favorite tricks when designing graphics with text is to create blocks of color to separate different parts of the graphic.
And of course, as I said earlier this week on my @isabelmadeline.va Instagram account… less is more. As much as you may not want to, try to limit your accent colors in your graphics. Keeping to that style guideI talked about earlier can do wonders for your brand.
After all this, you may be thinking… how is this going to make me stand out if everyone is going along these same guidelines?
Graphic designer Paul Rand may have put it best when he said,
When I was younger, my parents bought me this huge art set that included tons of markers, crayons, colored pencils and even some pastels. The first thing I did when I got it was dump them out and begin playing with them. But not necessarily…drawing with them.
See, I decided that these markers, crayons, pencils, pastels… were my friends and I used to group them in little families and make them talk to each other, like some kids might do with dolls.
Whenever my family goes into one of those modes of ‘Let’s make fun of and embarrass Isabel,’ this stage of my life usually pops up.
But honestly, all I can remember is having so much fun. It’s a little cliche, but for as long as I can remember, art has been my best friend.
Not everyone finds that one thing they can completely dissolve into, something that makes the world fade away and consumes their focus. And most certainly not everyone figures it out that early. But I was lucky enough to have two creative, artist parents who reinforced the love for art that I naturally acquired.
I don’t know where I would be if I didn’t get into art and graphic design. It has gotten me through some of my darkest times and been a way to express myself when I didn’t know how. Eventually this organic love turned into a major in college and a career shortly after.
When I started my full-time job, I knew I wouldn’t have enough time to do what I really loved. Like I’ve mentioned before, this is how my Virtual Assistant business came to be.
Every time I meet with a new client, they want to make sure that I have enough time and energy to work on their projects after my full-time job. But what they don’t fully realize is that I look forward to it.
Hopping on my laptop to design something, edit a website, create a blog post or even just help plan a project… that is like talking to my best friend all over again. And because I am so excited and passionate about what I get to do for my clients, I also want them to be passionate and excited about their own work.
This is why being a Virtual Assistant is so important and exciting to me. I get to help people make time for the things they truly love. The projects and ventures that are their best friends and not just some acquaintance they feel obligated to half-heartedly wave to.
What some small businesses and entrepreneurs see as a task… one they will most likely put off, I see as a break from all of my ‘tasks’. So, let’s jump on a call. Let’s discuss what you love doing and what you don’t or what you want to make time for and what you always put off. I’ll take care of the extra stuff and you focus on the projects you would consider are your best friend.
Don’t worry, I no longer talk and play house with my markers, crayons, pencils & pastels… but I do still get excited every time I sit down to create. I completely dissolve into it, the world fades away and it consumes my focus. I call it my niche, my passion, my calling.
Like I said last Wednesday, it’s pretty easy for anyone to take a decent picture now-a-days. With Super Retina display and 4x optical zoom range, smart phones have become the new DSLR. There are definite perks to this if you have no background in photography as the camera does most of the work.
But, it doesn’t do all of the work. Even if it’s not your top priority, knowing how to take great photos for Instagram is a skill any business owner or entrepreneur will benefit from having!
I already mentioned my favorite skill, the rule-of-thirds (which you can check out on my Instagram page @isabelmadeline.va), so we’ll skip that one for now. One of the most important aspects of any photo, professional or not, is lighting.
Lighting
Sunrise photo at my work about a year ago
Having too much or too little light can drastically affect your photo. Using natural light can make a photo beautiful, but there are also a few factors you have to keep in mind.
Early morning and sunset sun usually tend to cast the softest glow. An afternoon sun’s harsh rays often blow out a photo’s white parts.
The absolute best way to get a killer Instagram photo is to shoot in natural light! If you’re able to use natural sunlight or actually be outside, do it. You’ll notice your photos will look so much more professional than shooting inside or with flash.
Tip: Take a photo of the same subject, angle and scene throughout the day so you become familiar with the lighting that’s available to you.
Another great effect you can create yourself is adding layers.
Layers
Outdoor bar – notice there are subjects in the foreground & background that catch your eye.
You’ll still have a subject in focus but layers add interest and guide the viewer to your subject.
Mixing in different textures and having a foreground and/or background is an easy way to add depth to your photo with layers. Some smartphones also have portrait mode available to you which is another great way to create some depth in your photos.
Tip: Instead of a straight-on shot, add a leaf or branch on the side of your lens.. Taking photos through a window so some reflections are in the foreground can also be fun. You’ll need to tap on your phone screen to change the different focal points, so try it out and experiment with how it affects your resulting pictures.
Angles, angles, angles!
The smore’s stick not only helps create a yummy treat (or two) but a great angle to guide your eye.
Turning on gridlines in your phone’s camera settings can help create beautiful angles.
Matching the gridlines up so that all of your photo elements are parallel can create angles that are pleasing to the eye and will guide your audience in the direction you want. The tables or walls should be parallel in your photo to the camera’s gridlines.
Sometimes you might not want something completely predictable though, don’t be afraid to mix it up! If you’re going to try a new angle, make sure you make it deliberately not parallel to the gridlines. Having it only slightly off will only be bothersome.
Tip: Some smartphone cameras have a middle crosshair that appears when you’re taking an overhead shot. Use this to guarantee a perfectly lined up shot from above.
Point-of-Focus
An ornament I designed for a minor league baseball team I worked at.
Going along with Layers & Angles, you need to have a clear point of focus. Whether that’s a person in the foreground or a landscape in the background, just like your caption, your blog post, your newsletter, there’s a reason you’re taking this photo.
Great photos have multiple points of interest without feeling cluttered. Try and shoot photos that tell a story about the person or place.
You can also use Depth of Field, this will blur out the background to focus on your subject. Tap your subject and wait for a yellow square to appear, where you see the yellow square shows who/what is in focus.
And finally, Atmosphere
Steps near the Baltimore Art Museum
Think about props & your backdrop. The best Instagram photos usually have an appealing and eye-catching backdrop or props included.
Whether it’s the city you live in or are traveling, you can browse locations and hashtags on Instagram for inspiration!
Tip: Posing in front of the camera is hard, instead, ask your photographer friend to take bursts of you and just keep moving in front of the camera — some of the best shots are taken while in motion. And have something with you! Whether you’re going to be the subject of your photos, or you’re capturing some product shots, a prop or two can go along way in building a better photo.
From holding a cute coffee cup, to green foliage and plant-life, having something “extra” to your frame can bring it to life.
There is plenty more you can find on tips & tricks of amazing photos, but I hope this run down will give you an idea of what you can do by yourself to improve your posts! If this isn’t something you feel you have the time for, don’t hesitate to reach out as this can be something included in your personalized Virtual Assistant services!
And remember (this may sound a little cliche but) when in doubt, keep your camera out! You never know when inspiration might strike or the perfect photo opportunity may pass you by.
Oh boy. It’s been a while since I’ve done a blog post and I was a little nervous to sit down, stare at a blank document and come up with words. The last time I did one of these was probably in 2017… which was one of the worst years of my life so far, but we’ll get to that later.
The thing about blogging for me is, I always worry too much about if anyone will even read it. I procrastinate because I want perfection. I’m sure some of you reading this know what I’m talking about. It’s one thing to do your job as a freelancer, an entrepreneur, a small business owner. Doing what you love for clients you enjoy is one thing. But most of the time marketing for your occupation is an occupation itself.
This takes us back to 2017, the year of dread. I had just recently been laid off from my job, I was basically forced out of my own house because of a break-up, I was living in my car and hotels while looking for a cheap apartment. After finally finding my own place, I was told that the reason why I was 100 lbs overweight was because of a small brain tumor. Things were going great.
Looking back, this was probably not the best time to start my own freelance graphic design business, but because of my health issues, working from home and for myself seemed ideal. So I got busy marketing myself, started getting a couple clients and was off to the races!
After about a year of freelancing full-time, I started getting overwhelmed keeping up with doing the actual design work while also marketing myself and networking. Eventually, I broke down, moved to a new state and got a full-time job. Granted, a brain tumor and a couple surgeries might have had something to do with it too.
My point is, it’s really really hard to be a one man band. It’s possible, but in my experience, very stressful without some help. I don’t know if I even realized this myself until about a year into my new full-time job when Virtual Assistants started becoming a serious profession.
And that’s when the idea was born. I had Graphic Design in my back pocket, I had marketed & networked for myself so much that I was a self-taught pro at SEO and social media. Why not be a Virtual Assistant for other entrepreneurs & small businesses in the same position (hopefully minus the brain tumor) I was in 2017?
After thoroughly researching and going through the services that seemed most needed by businesses and entrepreneurs, I tweaked my website, updated my social medias and Isabel Madeline VA was born!
It’s sometimes hard to let go of your pride and joy, your baby, your business you built from the ground up. But my job isn’t to take over, just to help you make time for the tasks and projects you really want and need to focus on. Give me the extra work you don’t have time for or don’t like doing and I’ll keep your business running like a well-oiled machine!
If you find yourself struggling to keep up with ALL the things, don’t. Send me a message on my website at https://isabelmadeline.org/contact/ or simple respond to this e-mail and we can set up a time to discuss what services I can offer you to lighten the load.